


Pipe shelving is a trendy way to add storage space to just about any room. This DIY pipe project is the centerpiece of the laundry room storage ideas submitted by Brandi of Don’t Disturb This Groove for our DIY Challenge: Pipe series here on The Home Depot Blog.

We asked Brandi and several other fabulously talented crafters and bloggers to come up with ingenious DIY projects that use pipe as an ingredient. It could be just about any kind of pipe: galvanized pipe, PVC pipe or, as in this case, copper pipe.
We love how easy these laundry room shelves are to build, and the pipe shelving makes Brandi’s laundry room shelves look great.
Just follow the step-by-step tutorial to build your own pipe shelves.

PIPE SHELVING TUTORIAL
It was time to freshen up the look of our laundry room, and I needed some storage ideas. I had wanted to get rid of the wire shelves above the washer and dryer for a very long time. Although convenient, they are not sturdy, and they are unattractive and difficult to dust.
I was thrilled to have the opportunity to update the laundry room shelves through the Home Depot DIY Pipe Challenge.
I started looking for inspiration and came across a lot of great laundry room storage ideas. I fell in love with the look of the pipe shelves by Greg and Ashley Brown seen on 7th House on the Left. So with Greg and Ashley’s help, I created my own.
MATERIALS FOR THE PIPE SHELVES
6 – ¾-in. Flanges
6 – ¾-in. x 12-in. Steel nipples
6 – ¾-in. Caps to create supports for our shelves
2 – Pine boards (sized for your space)
Spackle knife
Spackle
Sandpaper
White paint (for wall trim)
Taupe paint (for wall)
Minwax Special Walnut stain (for shelves)
Stain applicator
Black spray paint
Measuring tape
Level
I chose pine boards for my project because I love the natural details in the knots of the wood. The Home Depot makes it very convenient and will cut your wood to size.
STEP 1
Once my supplies were gathered it was time to get started! I removed the old wire shelves and filled the holes with spackle, then let it dry.
Next, I sanded down the spackle and I painted the walls a bright new color and put a fresh coat of white paint on the trim.
STEP 2
I stained the boards using, Minwax Special Walnut. I loved the rustic, reclaimed wood look it produced.
STEP 3
Next I took my pipe pieces outside and coated them with Rust-Oleum black spray paint. I allowed everything to air out for a few days before moving on.
STEP 4
We decided where we wanted to place the shelves, and then we measured twice and made sure everything was level before drilling the screws into the studs. We also marked the flange placement with pencil marks to make it easier.
STEP 5
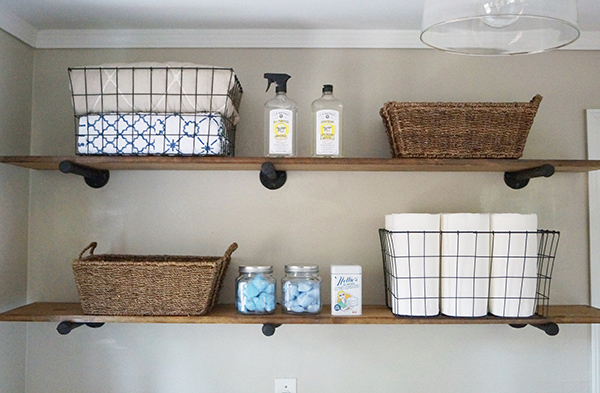
Once the laundry room shelves were up, we stood back and admired our work. They’re safely anchored. No worries about them crashing down in the middle of the night.
STEP 6
I had a lot of fun adding accessories! Wire baskets keep everything organized, and wicker baskets keep smaller items out of sight. Laundry is less of a hassle with everything tidy. I love having an extra shelf for more storage.


