


Sponsored Content
Popcorn ceilings, also known as cottage cheese or acoustic ceilings, have a bumpy and textured appearance. While some appreciate the finish, others find it outdated, difficult to clean and potentially hazardous. Many popcorn ceilings installed as late as the mid-80s may contain asbestos, so before starting this project, call an asbestos specialist or test the surface using an EPA-approved test kit (the sample collected with the kit must be mailed to a lab for testing and analysis).

If your popcorn ceiling is covered in paint, it may be more difficult to remove. Paint can prevent the texture from absorbing water, which is necessary to loosen the material. In this instance, you’ll likely need a chemical stripperto breakdown the paint barrier. Follow the manufacturer instructions when applying the chemical stripper.
Safety: The mere presence of asbestos in a home is not hazardous, but disturbing texture may release the fibers and become a health hazard. Removing asbestos should be only be done by a certified asbestos abatement contractor. The guidelines in this project are suggested for those who do not have asbestos in their home.
Gather Tools and Materials
Ladder – Use a ladder to reach high ceilings and tight corners. Have a partner stand nearby for added safety.
Tarp – Cover your carpet, furniture and belongings to protect them from debris.
Painter’s tape – Use to secure drop cloth or tarp along the floor.
Plastic sheeting – Use to cover nearby walls and lighting fixtures.
Safety gear – Protect your eyes, nose and mouth from excess dust and debris.
Paint scraper – This is the tool used to physically remove the popcorn texture from the ceiling.
Primer – Prime your newly uncovered ceiling before applying a fresh coat of paint.
Paint – Paint your newly unveiled ceiling for an even color throughout your space
Prepare the Workspace
Move small furniture items from the immediate area and cover larger pieces and other personal belongings with a tarp to shield them from dust and debris.
Turn off the heating and cooling system and cut the power to all ceiling fans and lighting fixtures.
Use painter’s tape to run rosin paper or drop cloth with a waterproof backing along the floor, then apply plastic sheeting to walls and fixtures.
Make sure to keep the room properly ventilated to allow fresh airflow.
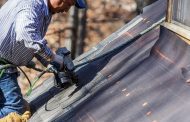
Remove the Popcorn Ceiling
Prepare to scrape off the textured material. Make sure to wear the proper safety protection when removing popcorn ceiling.
Paint scrapers help extend your reach when paired with a handle or painters pole.
You may scrap each section while it’s dry, but applying a bit of water often helps moisten and remove the material if the process becomes difficult. For dry scraping, work in small sections of about four to six square feet.
If you prefer to moisten the area, saturate a small section of the material with a bottle of warm water mixed with few drops of dishwashing soap. Apply enough to loosen the material without causing damage to the drywall underneath. Make several passes if necessary. Wait 15 to 20 minutes for the material to absorb the solution, then begin scrapping. If the material is still difficult to remove, repeat the moistening process.
Whichever method you choose, use a small putty knife to scrape corners, crown molding and extra residue. Remember to tidy the spots around fixtures that are left hanging, but be careful not to gouge the drywall or tear joint tape throughout the removal process.
Patch the Ceiling
You may need to patch some areas of drywall after the texture has been removed. Popcorn ceilings conceal imperfections that will become visible once the surface is uncovered.
Sand the ceiling once the repair work is dried but keep the sanding to a minimum so that you don’t damage any areas.
If you come across a visible nail or screw below the surface, cover it with joint compound. Allow it to fully dry, then sand the area.
Prime and paint your ceiling as desired.
Once dried, restore the power and arrange room back to normal.


